

Changing a semi truck tire is not complicated—but it is unforgiving. Every year, technicians are injured by vehicles that shifted on an unsecured jack, by wheels that rolled away, and by lug nuts that were never torqued correctly. The difference between a routine tire swap and a serious incident is rarely skill. It is sequence and discipline.
This guide walks through the seven steps professionals follow for a safe, repeatable semi truck tire change, from the moment the truck stops to the final torque check. It applies whether you are working in a fleet shop or at the roadside.
Before You Start: Five Quick Checks
A safe wheel change begins before any tool comes out.
- Confirm the replacement is correct. Match size, load rating, and tread requirements to the axle position.
- Inspect your lifting equipment. Check the jack for leaks, confirm the stands’ locking pins are present, and verify the impact wrench has an adequate air supply.
- Check the spare’s pressure. A tire that has sat on a rack for months is rarely at working pressure.
- Assess the surface. Level, solid ground only—no soft shoulders, no slopes, no bridge expansion joints.
- Brief your helper. If a second person is assisting, agree on hand signals and who does what before the work starts.
Skipping these checks is how a simple job turns into a call for recovery.
Step 1: Park Safely and Chock the Wheels
Everything starts with a stable vehicle.
- Choose level ground. A slope, soft shoulder, or crowned road surface makes every later step more dangerous.
- Set the parking brake and, if equipped, engage the trailer brake.
- Chock the wheels that stay on the ground—diagonally opposite the wheel you are removing. Wheel chocks are the cheapest safety device in the trade and the most frequently skipped.
- On a roadside, set out warning triangles well behind the vehicle and wear high-visibility clothing.
A truck that moves even a few centimetres during a semi truck tire change can drop off a jack. This step prevents that.
Step 2: Loosen the Lug Nuts Before Lifting
Break the torque while the tire is still on the ground, when the vehicle’s weight holds the wheel steady.
- Use a 1-inch impact wrench with impact-rated sockets for heavy commercial wheels.
- Loosen each nut a quarter to half turn—do not remove them yet.
- Work in a star or criss-cross pattern, not around the circle, to avoid stressing the hub.
- If a nut refuses to move, apply penetrating oil and allow time rather than forcing it with an extension bar.
Attempting to loosen nuts after the wheel is off the ground is one of the most common causes of wheel spin and injury.
Step 3: Lift with a Properly Rated Jack
Now the vehicle can leave the ground.
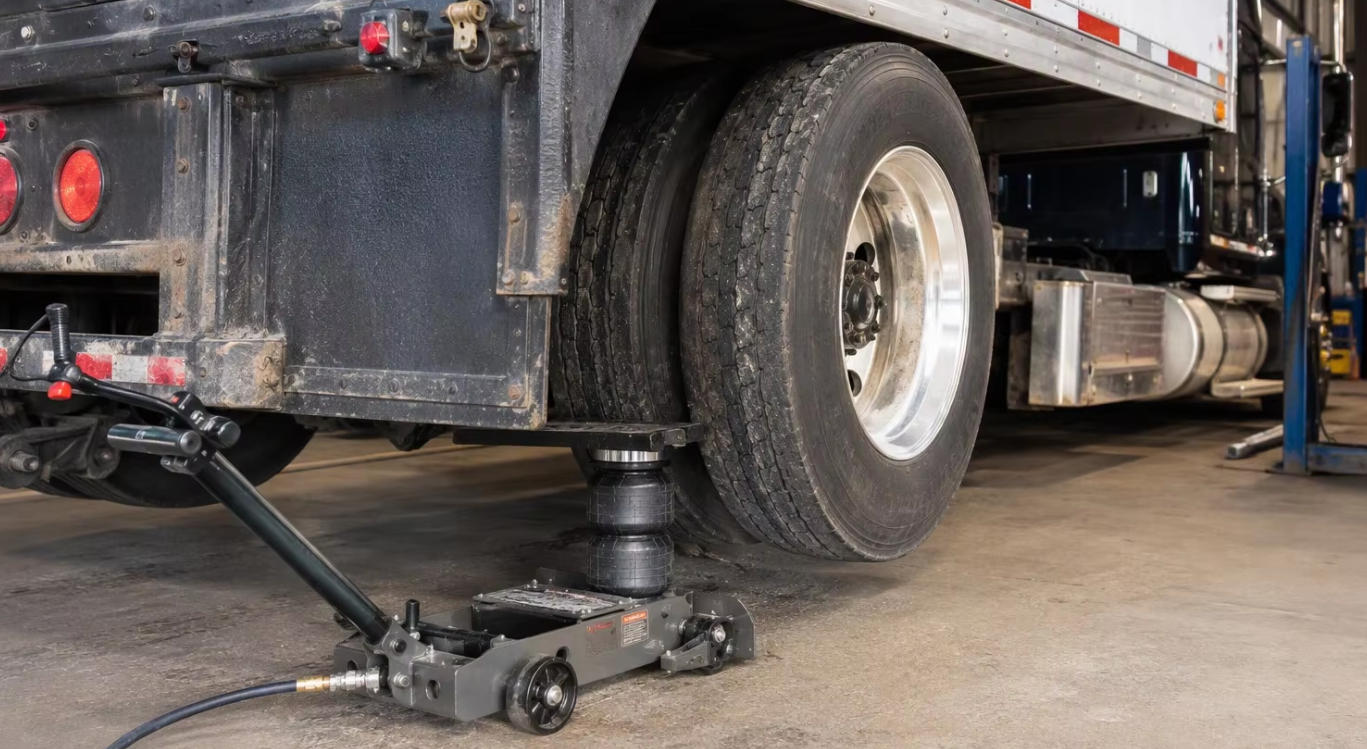
- Position a heavy-duty air hydraulic jack under the axle or a manufacturer-approved lifting point—never under the differential housing or a fuel tank.
- Verify the jack’s capacity exceeds the load on that axle, with margin.
- Raise the vehicle only until the tire clears the ground by a few centimetres. Extra height adds risk without benefit.
- Keep hands and feet clear of the jack as it rises.
An air hydraulic jack lifts a loaded axle in seconds with minimal effort, which is exactly why it dominates professional semi truck tire service. But speed is only safe when the jack is correctly rated and correctly placed.
Step 4: Support the Vehicle on Jack Stands
A jack lifts; it does not hold. This is the single most important rule in tire service.
- Place rated jack stands under the axle or frame, sized for the full axle load.
- Lower the jack until the weight rests firmly on the stands.
- Give the vehicle a firm push to confirm stability before reaching underneath.
- Leave the jack in place as a secondary support if it does not obstruct your work.
Working under a vehicle supported only by hydraulics is how preventable fatalities happen.
Step 5: Remove the Wheel
With the load secure, the wheel comes off.
- Remove the loosened nuts and keep them together—dropped nuts in gravel are easily lost.
- Grip the tire at opposite sides and lift with your legs, keeping your back straight.
- A commercial wheel assembly is heavy; use a wheel dolly or a second technician where possible.
- Roll the removed wheel clear of the work area and lay it flat so it cannot roll away.
Good lifting technique matters more here than anywhere else in the semi truck tire procedure.
Step 6: Mount the Replacement Wheel
Inspect before you install.
- Check the replacement tire for damage, correct size, and adequate tread depth.
- Clean the hub face and studs; debris between hub and wheel causes nuts to loosen in service.
- Lift the wheel onto the studs, aligning carefully rather than forcing.
- Fit the nuts by hand first, then snug them in a star pattern with the impact wrench—do not fully torque yet.
Cross-threading a stud at this stage turns a ten-minute job into a hub repair.
Step 7: Torque and Final Checks
This is where professionalism shows.
- Lower the vehicle until the tire carries weight, then remove the jack stands.
- Torque the nuts in a star pattern to the manufacturer’s specification—typically in the 450 to 500 ft-lb range for heavy commercial wheels, but always confirm for your application.
- Use a calibrated torque wrench, not an impact wrench, for final tightening.
- Re-check torque after the first 50 to 100 kilometres of driving, and again at the recommended service interval.
- Verify tire pressure, confirm the wheel spins freely, and stow all tools.
Under-torqued nuts cause wheels to depart; over-torqued nuts stretch studs and make the next semi truck tire change far harder.

Tools You Actually Need
Safety Rules Worth Repeating
- Never work under a vehicle held only by a jack.
- Never exceed a jack’s rated capacity.
- Never use chrome (non-impact) sockets on an impact wrench.
- Never torque in a circle; always in a star pattern.
- Never skip the re-torque check after the first drive.
One more rule deserves its own line: never rush a wheel change to save a customer ten minutes. The sequence exists because each step prevents a specific failure mode—wheel-off, jack collapse, crush injury, or stud failure. Experienced technicians follow it precisely, and that discipline is exactly why they remain experienced.
When to Replace Rather Than Reuse
Not every removed wheel goes back into service. Replace the tire, or move it to a lower-stress position, when you find:
- Tread at or near the legal minimum
- Sidewall damage, bulging, or exposed cord
- Cuts deep enough to reach the casing
- Irregular wear suggesting an alignment or inflation problem
- Age-related cracking, even with adequate tread depth
A wheel change is also the cheapest moment to catch these problems—the wheel is already off, and the vehicle is already in the bay.
FAQ: Frequently Asked Questions
- Q: What size jack do I need to change a semi truck tire?
- A: Match capacity to the axle load with margin. Most heavy commercial axles call for a 20-ton or higher air hydraulic jack; always confirm the actual axle weight.
- Q: Can I change a semi truck tire without jack stands?
- A: No. A jack is for lifting only. Rated jack stands must carry the load before you reach under the vehicle.
- Q: How tight should semi truck lug nuts be?
- A: Commonly 450-500 ft-lbs, but specifications vary by wheel and hub system. Always follow the manufacturer’s figure and use a calibrated torque wrench.
- Q: Why do lug nuts loosen after a tire change?
- A: Usually insufficient torque, an unclean hub face, or a missed re-torque check after the first drive. All three are preventable.
- Q: How long does a semi truck tire change take?
- A: With proper tools, a single wheel typically takes 20-30 minutes. Air hydraulic lifting and a 1-inch impact wrench cut this significantly compared with manual methods.
- Q: Is it safe to change a truck tire on the roadside?
- A: Only with warning triangles, high-visibility clothing, level ground, and full chocking. If traffic or terrain makes it unsafe, call for recovery instead.
- Q: Do I need a tire changer machine for truck tires?
- A: Not for a roadside swap. A tire changer machine is used to mount and demount the tire from the rim—a separate operation normally done in the shop.
- Q: Can one person change a semi truck tire alone?
- A: It is possible with the right tools, but a commercial wheel assembly is heavy and awkward. A wheel dolly, or a second technician, sharply reduces the risk of back injury and dropped wheels.
- Q: How often should commercial wheels be re-torqued?
- A: After the first 50-100 kilometres following a change, then at the manufacturer’s interval—commonly every 10,000 to 15,000 kilometres for commercial vehicles.

Conclusion: Sequence Is Safety
Changing a semi truck tire safely comes down to doing seven familiar steps in the right order, every time, without shortcuts. Chock the wheels. Loosen before lifting. Lift with a rated jack. Support on stands. Remove carefully. Mount cleanly. Torque properly.
Do that, and the job stays routine. Skip a step, and it becomes the story nobody wants to tell. Equip your team with professional-grade lifting and impact tools from Jingji Lifting, and make every tire change a safe one.


